Serving all of Riverside County Over 30 years in Riverside County·5.0 from 123 reviews
(951) 232-9778Talk to Beau Mon–Sat · 8am–6pm · Closed Sunday
Checking hours…

Weather seals · Bottom, sides and floor

Which garage door bottom seal do you need?The channel on your door decides.

Most bottom seals slide into a channel on the door, and the channel decides what fits. Here’s how to identify yours, replace it safely and close the other gaps.

By Beau Nichols, owner and lead technicianPublished Last reviewed About 15 minutes

Call (951) 232-9778
A white single-car steel garage door set in a brick front wall, with the concrete driveway in front of it wet from rain
A wet driveway is when a worn bottom seal gives itself away

A garage door bottom seal is the rubber or vinyl strip along the bottom of the door, and on most doors it slides into a metal channel whose shape decides which replacement fits. Look at the end of the door’s bottom edge. Two T-shaped slots take a T-end seal, two rounded slots take a bead-end seal, and a single slot usually takes a bulb or J-type seal. Take a cut piece of the old seal with you when you buy. Replace the seal when you see daylight under the door, when water, dust or bugs get in, or when the rubber is flat, cracked or hard. Sliding a new seal into the channel is a fair homeowner job, with the opener unplugged and the door clamped so it can’t move. Never loosen the brackets at the door’s two bottom corners. They hold the lift cables under spring tension.

Call (951) 232-9778 Monday–Saturday, 8am–6pm · Closed Sunday

ThreeSeals on a typical door
The channelDecides which seal fits
2x4Reversal test after a new seal
FreeFor us to come and look

Know what you’re looking at

Three seals keep the weather outand they wear at different speeds.

Most homes have the first two. The third is an add-on.

The bottom seal

A rubber or vinyl strip across the bottom edge of the door. On most steel doors it slides into an aluminum channel called a retainer. Older wood doors often have one nailed on instead.

It gets squashed on every close and baked in the sun. It’s the seal you’ll replace most.
Side and top weatherstrip

A strip nailed or screwed to the frame around the opening, often called stop molding. A soft flap along its edge rests on the face of the closed door.

It fails slowly, by going stiff and curling away from the door.

The threshold seal (optional)

A raised rubber strip glued to the floor, just inside where the door lands. The door closes against it.

It earns its place where the slab dips, or where rain runs down the driveway into the garage.

Picking seals for a new door is a different question, and the climate guide covers what to specify. This page is about the door you already have.

If you see this

Six signs the seal is doneand what each one points to.

Look from inside on a bright afternoon, door closed, lights off.

Daylight along the bottom

A thin, even line of light across the whole width means the seal has flattened or shrunk.

Replace the seal. Same type, new strip. The steps are below.

Light at one end only

A wedge of light, wide at one corner and gone at the other, usually means a low spot in the slab or a door sitting crooked.

A new seal may not fix it. Read the uneven floor section first.

Rubber that stays dented

Press the seal with your thumb. Good rubber springs back. A seal that stays squashed, feels like hard plastic or has split along its fold can’t follow the floor.

Replace the seal. It won’t recover.

Water or sand inside the door

A damp strip after rain, or a line of dust just inside the door, shows exactly where the seal isn’t touching.

Replace it, or add a threshold. For water off a sloping driveway, a threshold usually does more.

Bugs, webs or droppings

Scorpions, spiders and mice come in low, usually at the corners. Webs or droppings along the bottom edge mean something is getting in.

Close the gap. Check the bottom seal and both lower corners.

Seal hanging out at one end

A seal that creeps out of its channel usually means the channel ends were never pinched shut.

Usually a simple fix. If the channel itself is bent or pulling off the door, that’s a repair, not a seal swap.

When to check them through the year is in the maintenance calendar.

Next step

Rather hand it over?We match the seal to your channel.

Or if something else turned up while you were looking, start there.

Mon–Sat 8am–6pm Something wrong with the door right now?

Three quick questions narrow it down before you talk to anyone.

(951) 232-9778Mon–Sat · 8am–6pm

Identify it by the channel

Garage door bottom seal typesand how each one holds on.

Seals are sold by how they attach, not by who made the door. Names vary between suppliers, so go by the shape.

Common garage door bottom seal types, how each attaches to the door, how to recognize it, and what to watch for when buying a replacement.
Seal typeHow it attachesHow to spot itWorth knowing
T-end sealA U-shaped strip with a T on each edge.Both T edges slide into a two-slot metal retainer. The loop between them flattens on the floor.Two narrow, square-shouldered slots, and a small T on each side of the seal’s cut end.The most common kind on steel doors. The T is usually 1/4 inch and sometimes 5/16 inch, and the two don’t swap.
Bead-end sealA U-shaped strip with a round bead on each edge.Same idea as the T-end, but round beads slide into rounded slots.Rounded slots, and edges that look like small round cords.Looks like a T-end from outside, but a bead seal won’t lock into a T channel, or the reverse.
Bulb sealA hollow tube.An edge on top of the tube slides into the retainer. The tube squashes against the floor.A round or oval tube instead of a loop.For doors that already have a bulb retainer. A bulb that stays flat is finished.
J-type sealA flap that curls as the door closes.Slides into a single-slot retainer. Some kits come with their own retainer.One slot, and a flat flap that bends into a J against the floor.Kits with a retainer suit doors that never had one. The retainer must match the door’s thickness.
Nailed-on sealNo channel at all.A flat or flanged strip nailed or screwed to the bottom of the door.No metal channel, and fastener heads along the bottom edge.Common on older wood doors. Stay well clear of the two bottom corners when you pull the fasteners.

Still not sure? Take a short piece of the old seal with you and match it at the counter.

Before you buy

How to identify and measure yoursin about five minutes.

Start at the end of the door. From inside the garage, look at the end of the bottom edge, beside the track. You’ll see the end of the channel with the seal’s edges sitting in it. The shape of those slots tells you most of what you need.

Get a sample. If the old seal sticks out past the door, trim an inch off; the cut end shows a T, a bead or a tube. If not, photograph the channel end.

Take three measurements. The door’s width, for length. One door maker’s own parts catalog says to order about a foot more, so it’s never short. Then the old seal’s width laid flat, and the width of the T or bead if you have a cut end.

Don’t go by the model number alone. The same model of door can carry different retainers. Trust the channel.

Check the channel too. If it’s bent, crushed, split or pulling away from the door, a new seal won’t slide in or sit straight. The channel’s ends sit right beside the corner brackets, so replacing it is a job for us.

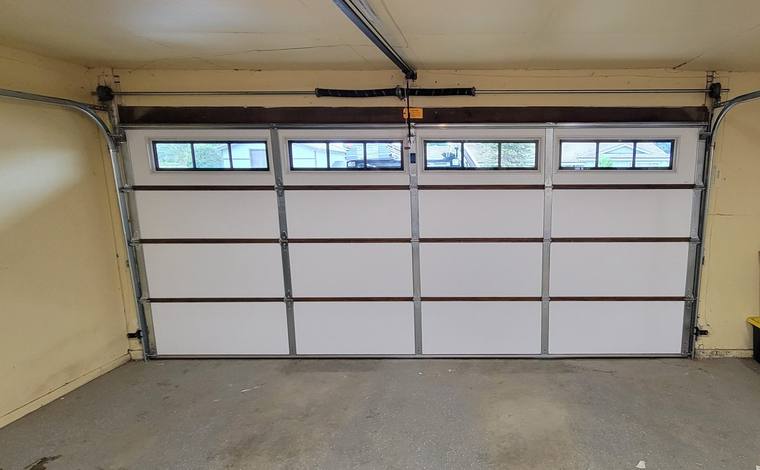
The inside of a garage looking at a closed white steel sectional door with a row of windows, the vertical tracks at each side and the bottom edge resting on the concrete floor
From inside you can see the whole job: the bottom edge on the slab, the tracks, and the two lower corners where the lift cables attach. Those corners you leave alone.

The safe version

How to replace a garage door bottom sealwhen it slides out of a channel.

It’s a fair homeowner job when the seal slides out and nothing else has to come apart.

What you need

New seal, about a foot longer than the door · Utility knife · Flat screwdriver and pliers · Soapy water or silicone spray · Two C-clamps or locking pliers · A helper

Time Usually an hour or so with two people

  1. Look first.With the door closed, look at the springs and at the cables on each side. A gap in a spring, or a frayed or slack cable, means stop and call.
  2. Raise it, then unplug the opener.Run the door up to about chest height, then unplug the opener so nobody can press a button while you work. Leave the red release cord alone. With the door up, the opener is holding it.
  3. Make sure it stays put.Clamp a C-clamp or locking pliers onto each side track, just below a roller. No opener? Lift the door by hand. A balanced door stays where you let go. If yours drifts down or creeps up, don’t work under it. Close it carefully and read why that’s a spring problem.
  4. Open the channel ends.Most channels are pinched shut or capped at each end. Ease one end open with a flat screwdriver. Touch only the channel, never the corner bracket beside it.
  5. Slide the old seal out.Pull it from one end. If it’s brittle and snaps, cut it and take it out in pieces. Wipe the grit out of the slots.
  6. Wet the channel and the seal.Spray soapy water or silicone into the slots and along the new seal’s edges. Dry rubber drags so hard it can stall halfway.
  7. Feed the new seal in.One person feeds the edges in straight at one end. The other pulls gently from the far end, in short pulls. Wet it again if it binds.
  8. Trim it and close the ends.Center it, leaving it a little long at each end so it reaches into the corners. Trim with the knife, then pinch the channel ends shut with pliers.
  9. Unclamp, plug in and test.Remove the clamps, plug in the opener and close the door. The seal should touch the floor all the way across. Then lay a 2x4 flat under the door and close it again. The door must reverse when it touches the board. Our answers page covers both safety tests.

Never loosen the bottom corner brackets

The brackets at the door’s two lower corners hold the lift cables, and they’re under spring tension whether the door is open or closed. Never loosen or remove their bolts or screws to free a seal or a channel, not even partway. If the seal can’t come out without touching those corners, or the channel has to come off, stop and call us.

A seal that won’t slide at all usually means a bent or corroded channel. Don’t force it. Replacing the channel is our part.

Mon–Sat 8am–6pm

Channel bent, or the seal won’t slide out?

That’s our part. We replace the channel and seal together and check the door closes to the floor.

(951) 232-9778

When the slab isn’t flat

Garage door seal for an uneven floormatch the fix to the size of the gap.

Plenty of slabs settle, or were never poured flat at the door. The size of the gap decides the fix.

Small dips: a taller seal

A wider U-shaped seal hangs lower, so it has more rubber to fold into shallow low spots. T-end seals come in several widths, measured laid flat, and at least one door maker sells an extra-tall one for badly uneven floors.

Stay within what your channel takes. The seal should squash evenly, not bunch up.

Bigger dips or water: a threshold

A threshold is a rubber hump glued to the slab just inside the closed door. The door lands against it, and it turns back rain running down a sloped driveway.

The slab must be clean, dry and uncracked there. Give the glue about a day before you drive over it.

When the seal isn’t the real fix

If the gap is bigger than any seal can bridge, the fix is in the concrete. If it showed up suddenly on one side, the door may be hanging crooked on a cable. That’s a call, not a seal. Here’s what a cable problem looks like.

If the door stops short of the floor, or presses so hard it bounces back up, the opener’s close setting is off. That’s an adjustment, not a new seal, and the reversal test has to pass afterward.

The rest of the perimeter

Garage door weather stripping on the sides and topset it to touch, not to squeeze.

Getting these strips right is mostly about where you set them.

The flap should just touch the closed door. Set each strip so its soft flap rests on the door face and curves over a little. The stiff backing shouldn’t touch the door at all.

Too tight makes the door drag. A strip pressed hard into the door rubs on every trip, scuffs the finish and makes the opener strain. Run the door afterward and listen for rubbing.

Too loose lets the light in. Light up the sides or across the top means the flap isn’t reaching. Pull the nails or screws, set the strip a little closer and fasten it again.

Replace it when the flap goes stiff. Sun hardens the flap until it curls away, and wood stop can rot where water sits. Put new strip up in full lengths with the door closed, fastened every six to eight inches or so.

Mind the bottom corners. The weakest spot is where the side strip meets the floor and the bottom seal ends. Leave the bottom seal a touch long, and bring the side strip all the way down to the slab. That corner is where mice and scorpions get in.

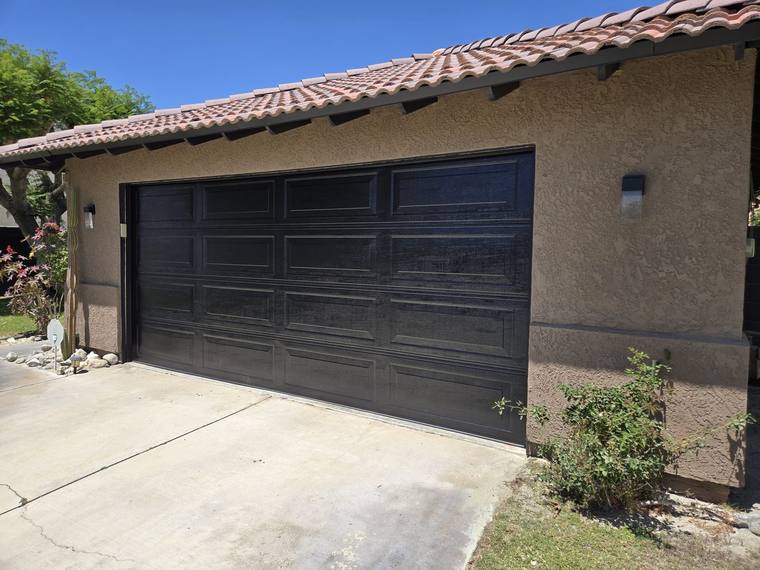
A black raised-panel steel garage door on a stucco house with a clay tile roof, in bright sun with desert plants beside the driveway
Full afternoon sun on a dark door. The bottom seal sits in that heat for hours, which is why desert seals tend to go hard first.

Riverside County

What our weather does to garage door sealsdepends on where you live.

The same seal ages very differently in Palm Desert, Banning and Idyllwild. Here’s where the advice changes.

Coachella Valley and Blythe: heat

Sun and heat cook the rubber until it’s hard and cracked, and it shrinks back from the ends. A hard seal can look whole and still miss the slab. Side and top molding made for high heat exists, and it’s worth asking for out here.

The San Gorgonio Pass: blown dust

In Banning and Beaumont, the wind drives fine sand through any gap. A dust line inside the door is the giveaway. The side strips matter as much as the bottom seal here.

Santa Ana days

In the inland valleys, Santa Ana winds pile grit and leaves against the bottom of the door. Afterward, sweep it clear and look for new light.

Scorpions, spiders and mice

UC pest guidance says a house mouse can squeeze under a gap about a quarter inch tall. It lists the Arizona hairy scorpion in Riverside County, often around homes and garages. The bark scorpion, found near the Arizona line, needs only a crack of about a sixteenth of an inch.

The mountains: embers

In Idyllwild, Anza, Aguanga and the rest of wildfire country, gaps around a garage door let embers in. For buildings in designated fire hazard areas, the California Wildland-Urban Interface Code (section 504.9.2, 2025 edition) sets a maximum gap at the bottom, sides and top. Ask us or the building department what applies to your house. The permit guide explains how that’s decided.

Storms and sloping driveways

Rain is rare, but a monsoon storm or a winter downpour sends water down any driveway that falls toward the garage. On a driveway like that, a threshold does the heavy lifting.

Questions

Garage door seals and weather stripping,answered.

The questions people ask most about bottom seals and weather stripping.

Not answered here?

Call and ask. There’s no charge for a question, and Beau has been doing this since 1996.

(951) 232-9778Mon–Sat 8am–6pm
Are garage door bottom seals universal?

No. A bottom seal has to match the channel on your door, and the common channels don’t take each other’s seals. A T-end won’t lock into a bead channel.

Seals sold as universal are usually one common profile, or a nailed-on strip for doors with no channel. Take a piece of the old seal with you.

Can I replace my garage door bottom seal myself?

Usually, yes, if it slides out of a channel and nothing else has to come apart. Raise the door, unplug the opener, clamp the tracks, then swap the seal using soapy water.

Stop and call if the channel has to come off, or if anything at the two bottom corners would need loosening. Those brackets hold the lift cables under spring tension.

How do I know what size bottom seal to buy?

Measure the door’s width and buy about a foot more. Measure the old seal laid flat. For a T-end seal, check the T itself: 1/4 inch is the usual size and 5/16 inch is the other common one.

Easiest of all, take a cut piece of the old seal with you and match it.

How do I install weather stripping on the sides and top of a garage door?

With the door closed, hold each strip against the frame so its soft flap just touches the door and curves over. Nail or screw it along its length, keeping the stiff part off the door.

Then run the door. If it drags, or the opener sounds like it’s working harder, the strip is too tight. Move it back slightly.

Do I need to adjust my opener after a new bottom seal?

Sometimes. A new seal is usually thicker than the flattened one it replaced. If the door now stops short, or presses down and bounces back up, the opener’s close setting needs adjusting.

Either way, run the reversal test afterward. Lay a 2x4 flat under the door and close it. The door must reverse when it touches the board.

Why does my garage door bottom seal keep sliding out?

Usually the channel ends were never pinched shut, or the end caps are missing. Slide the seal back, center it and squeeze the ends closed with pliers.

If it keeps working out at one spot, look for a dent, a split or a section pulling off the door. That channel needs replacing, which is a job for us.

All 54 questions answered →

Further reading

Where to go from heredepending on what you found.

Garage door maintenance in Riverside County

When to check the seals in your part of the county.

The maintenance guide

The climate guide

Buying a new door? What seal to specify for the desert, the pass and the mountains.

The climate guide

Garage door spring safety

If the door wouldn’t stay put while you worked on the seal, this explains why and what comes next.

The spring safety guide

On a visit

What we do about sealswhen we’re at your door.

We start with the door closed and the lights off, and look at where the light and dirt get in. That tells us whether it’s the seal, the floor, the side strips or the door itself.

If it’s the seal, we match it to your channel. If the channel is bent or corroded, we replace it, working around the corner brackets safely. We set the side and top strips to touch without dragging, and check that the opener closes the door fully without pressing too hard.

Before we leave, we run both safety tests, the photo-eye test and the reversal test on a 2x4, and you see them done. The price is agreed before any work starts, and looking is free. If we’re there for something else, ask us to check the seals too.

Light, water or dust under your door?Call and describe it.

Tell us where it gets in and what’s on the bottom of your door. If it’s a seal you can slide in yourself, we’ll tell you so.

Call (951) 232-9778

Riverside Classic Garage Doors · 6410 Industrial Ave #3, Riverside, CA 92504 · (951) 232-9778 · Monday–Saturday, 8am–6pm · Closed Sunday

Get a call back

Mon–Sat 8am–6pm

A few quick fields. Beau, or the tech who’d come out, calls you back.

We call this number. We don’t sell it or add you to a list. Urgent? Call (951) 232-9778.

WhatsApp us